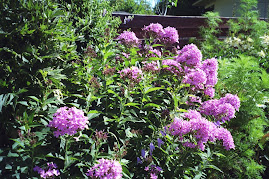
Prepare to prop. Why? Some plants lean to the light. They lean so far they sometimes fall over. Daisies do this as does phlox. Lilies are leaners too. Sometimes the entire garden leans. The larger plants at the back lean forward tilting the guys in front and so on. Here is how to put a stop to this insidious habit.
Take a strong stick about 16 inches to two feet long. Jam it into the ground at an angle. The plants lean on the stick. If necessary, jam in another so it runs the opposite way, making a wide X. This is the quickest way to prop. Bushy plants like shasta daisies, asters, and phlox hide the sticks quite well.
There are many types of plant props available. I bought some metal stakes with sliding loops on them. These work well for lilies. I also bought a group of metal bars that link together to form a cage. These turned out to be more trouble than they are worth. I could not take the trouble to arrange everything at just the same height so that the links would join.
TIP. Collect propping stakes now. They must be strong enough to ram into the soil. A half broom stick (unpainted) works well hammered in. A broken down clothes horse provided me with many strong wooden stakes.
Saturday, 31 May 2008
Friday, 30 May 2008
WHAT A WEEK
Two nights of below zero, two evenings covering my annuals, two dawn forays to water away the frost and then, the reward--two fabulous days of paradise. Only the geraniums and one begonia were badly frost damaged. They are alive but addled looking.
This is the time of year for plant sales. I dropped into the Labour Centre last Tuesday to check out the sale for the Arthritis Society. The usual perennial customers were there, the splits off the hardy plants of the city. If I were starting a perennial bed, I’d start with this kind of sale.
Ice cream pails held chunks of the golden orange day lily which nothing can kill. The dark purple bearded iris sat next to a row of goat’s beard, a great find for a new gardener. Pots of the world’s hardiest hosta, a green with white edges, took up one end of a table. Fifteen minutes after the doors opened, the stock was going fast. I was delighted to scoop up four columbine plants at 2$ each and a big shasta daisy for 6 bucks. These plants replace my winter losses. I was tempted by the lamium, a variegated creeping plant that makes great edges and the Virginia creeper.
Meanwhile in the garden. I’ve planted all the annuals. I’ve swept out the garden shed and hosed down the plastic trays and containers. The squash, zucchini and cucumber plants are sitting in the sun, ready to be planted after I arrange the weed barrier over the small area I call a vegetable garden. Nothing to do but get a book and a cup of tea and watch the birds. What a week!
TIP: check the yard sales listing in the newspaper for plant sales this weekend.
Thursday, 29 May 2008
STAKING DELPHINIUMS AND MONK'S HOOD
Monk’s hood. This plant buckles at the knees but prevention is easy. The plant is composed of several long, hollow, rather weak stems. A heavy summer rainstorm with a strong wind can fell the stalks. I put a tomato cage on the small monk’s hood. If necessary I use a piece of wire to enlarge the cage. (see the post on peonies). Mature plants need larger cages. Last year I bought a metal plant support which works as well as a cage. It is a half circle of metal held up by legs which are pushed into the ground. I use it for a plant that is growing against a fence. I also take a long piece of wire, twist one end around the fence and circle it around the plant.
Delphiniums. The short variety stakes up the same as the monk’s hood. The large Pacific Giants are another matter altogether.
These are the world’s most annoying plants. They grow six feet or more on long, hallow, weak stalks. If I get them tied up well they look great even after a storm. If they are not tied up well, the flower heads snap. A Thunder Bay summer storm will also break the stalks, flatten them to the ground and generally beat them up. Even tying them up tries the patience because they snap or bend when you work with them. Why do I go on? Because, tall dark blue delphiniums lift your heart to the skies.
I use the tallest biggest plant cages for the delphiniums. When I run out I use peony cages. The cages just protect the first few feet of the plant. I put a very long metal stake inside the cage to prevent the cage from toppling over with the weight of the growing plants. I use an eight foot stake but when I run out I use six foot stakes. I need the tallest stakes to tie the blooms on.
As the plant grows, I use the wire loop method (see peonies, below) to support the stalks. Delphiniums are deceptive. They look strong in the early stages but, as mentioned, any good wind will flatten them. Eventually, the stalks produce a run of florets that often end in a graceful curl. These sway in the breeze but in actuality, they are as weak as water. I have to use a small kitchen stool to reach the flowers. I hook a wire from the metal stake up and around, making a protective circle around the flower fronds.
When the flowers die down, I let them go to seed. Some books recommend cutting them back to get a second crop. I found this a lot of work for little return. The second crop of flowers was spindly, insignificant and even weaker than the first. I just leave the plants alone. The birds like the seeds and eat them all winter. I do not cut the stalks down in the fall because they catch the snow and insulate the roots. This way, I’ve never lost a delphinium to winter kill.
A few more notes on delphinium. Some of the Pacific Giants are named after the knights and ladies of the Round Table. My favourite is King Arthur, a bright purple. Sir Lancelot wears blue and Galahad, white. Queen Guinevere is dressed in pinkish mauve. Delphiniums are long blooming plants, blooming longer than the monk’s hood. They are also easy to start inside from seed. Local yard sales invariably offer them at a good price. If you are not interested in the staking exercise described above, get the shorter variety (Bluebird is good) and put a tomato cage around it.
Tuesday, 27 May 2008
Fighting the Freeze
Ice coated the birdbaths at 6 this morning when I got up to see how my planted annuals fared in the below-freezing temperatures. After gardening at this address for nineteen years, I know which areas are most susceptible to frost and which areas ride it out. I know the front yard is the warmest and the north west corner of the back yard the coldest. Even one degree can make a difference. Usually the highest elevations are warmer than lower. So I started spraying water on the plants in the vulnerable areas. I removed the pots, pans and even two waste paper baskets I had put over the bigger plants. I pulled off the space blankets (survival blankets) that I had spread around last night using rocks, tools and any damn thing to hold them flat from the wind. I took a break and came out and sprayed the flower beds again, this time doing the front garden as well. Later, just after sun rise, I sprayed again.
The results. All the annuals that were covered survived well, even the geraniums. Plants with big flat leaves like geraniums are the most susceptible to frost so I'd been worried about them. The begonias which were covered with the wastepaper baskets did better than the one that got no covering at all. It will lose a few leaves, I'm afraid, but it will survive.
Some people cover with old bed sheets and this works well. Many years ago, when I lived in Kaministiquia, we covered vegetables with clear plastic but I would not recommend this practice. A bright dawn sun can burn the leaves through the plastic. Besides, plastic sheeting is awkward and heavy and flattens plants. A few years ago, I had a stroke of luck, a sale at Canada Tire of space blankets for a buck each. I bought ten. They have served me well. I also have an old row cover or frost cover and it protected the nicotania on the northwest corner. Plants by a house will survive a frost better than those in the open garden. So, new gardeners, I suggest you watch carefully in the fall to see where the frost hits first. This knowledge could save your garden.
Monday, 26 May 2008
THE MERCURY IN THE THERMOMETER”S SOCKS
We interrupt this discussion of cages and propping. It is cold out and supposed to get to minus 3 in the night. Emergency measures needed. I am putting a pot or cover over all the recently planted annuals. However, with this high wind, plastic flower pots may blow away. The perennials can fare for themselves. I carried all the flats of annuals into the shed and have hooked up a small heater which I will switch on at midnight. I’ll get up before dawn and water the entire garden to wash the frost off. That’s the plan and I’ll let you know the results. The sky is cloudy, a hopeful sign. When you get a clear sky and dropping temperatures, watch out.
Sunday, 25 May 2008
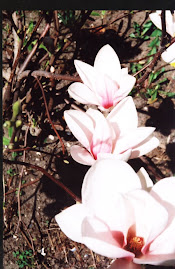
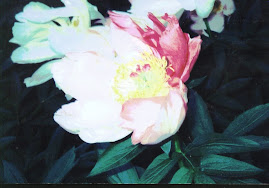
PEONIES, TIPS AND TRICKS
These lovely plants produce large flower heads that seem to be too heavy for the stalks. When it rains the flower becomes heavy with water, like a sponge. Then the entire stalk sinks to the ground. If left unstaked, the plant will sprawl in the soil.
IMO the best way to prop up a peony is to start with a large cage. I place it upside down with the three wire spikes pointing up. The peonies will grow much taller than the cage and need the extra inches these spikes give. I then drive a long metal stake into the ground just inside the cage. This will prevent the plant from tipping the entire cage as it grows. The stake is also useful in the tying up process.
The plant grows inside the rungs of the cage and soon grows outside them. Soon the flower buds emerge growing on their own stalks higher than the leafy branches. At this point, I use light wire, like picture wire, to enlarge the cage. (note: you can get picture wire in the Dollar Store). I cut off a long piece of wire, twist one end around the spike at the top of the cage and make loops of wire to hold up the heavy peony flowers. Light wire is easy to work with and much less fiddle than tying individual stalks up with twine. You can use the same wire year after year.
If necessary, I use more long pieces of wire to make loops part way down the cage to catch up any stalks growing outside the cage. Of course, I do not wrap wire closely around the stalks; I use the wire to make loops that the stalks can lean on. The wire is almost invisible and even the cage cannot be seen once the plant grows around it.
Some of my peony plants are so big, they tilt the cage over even though the cage is staked to the ground. A few times, I have had to put a couple of bricks or rocks on the bottom rung of the cage to hold it in place.
After a few weeks, peony blooms shrink and desiccate. In some varieties the flower opens to show the red heart in the centre. The petals turn brown at the edges and curl. If you give a petal a gentle tug, it comes away in your hand. At this point, it is a good idea to cut the blooms off. Peony blooms are composed of hundred of petals. When the bloom dies away, the petals are released. Most fall into the plant. They stick to the leaves and turn an unsightly brown. They create a brown mat on the ground. It is best to get the fading blooms off before this happens.
A word about stakes. I originally purchased bamboo stakes because I thought they were the most aesthetic looking. However, they break easily. I switched to the dark green metal stakes but I don’t use many. I also have a collection of sticks and bamboo lengths for propping up leaning plants.
Watch for tips on caging and propping.
CAGES - part one.
There are three sizes of plant cages available, the small “tomato cages” the tall cages like tomato cages on steroids and the big fat peony cages. All are inadequate for the northern garden where our large plants soon outgrow them. Nevertheless, now is the time to start putting a few cages around the fastest growers because you cannot easily get them in place once the plants take off, which will happen in a couple of weeks. Our long hours of sunshine and cool nights with abundant dew just send the plants leaping skywards.
The three plants which must be caged are the 1) delphiniums, 2) monks hood and 3) peonies. Other large plants such as phlox need little or no staking or tying up. I put a cage over my huge bleeding heart just to keep it from flowing over its neighbours, but bleeding heart usually does not have to be supported. The Japanese peony, a smallish plant, is happy with a peony ring, a hoop of wire on a metal stake. These are close to useless for full sized bombe type peonies. I also cage the big goat’s beard.
Stay tuned for tips on caging your peony
Saturday, 24 May 2008
SURPRISE! SURPRISE!
The end of May always brings surprises and not all are good. For instance, there is the shock of finding a big clump of shasta daisies has disappeared over the winter. Of course it might have migrated and could be close by. The concept of migrating plants is unknown to southerners but it happens in the north.. We know that rocks move in the winter, and new rocks appear, and houses, sheds and fences shift and so it makes sense that plants migrate too. I once had a lily move over a few inches to land up tucked against a peony. For some reason, a large allium is growing in the back of the veggie garden, four feet from where it was planted.
But there have been winter losses. Only one columbine came back from the cold. Four or five others did not make it. I cut off a third of a cedar bush, unalterably dead. The daphne struggles on.
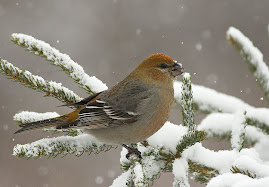
But good things happen as well. Today, not only did the evening grosbeaks show up again but American goldfinches, like yellow ping pong balls, arrived and bounced around the garden. However, the greatest surprise was the appearance of a hermit thrush slipping out from behind a rose bush to take a drink.
Another wonderful surprise was the hot weather. I went from bush jacket to sweats to long sleeved shirt. This is as good a time as any to remind gardeners to use sunscreen. Keep the container by the back door to remind you to put it on every time you go out to do garden work. It is no fun at all to have pre-cancerous lesions burned from your face. That is the kind of surprise you really, really want to avoid.
But there have been winter losses. Only one columbine came back from the cold. Four or five others did not make it. I cut off a third of a cedar bush, unalterably dead. The daphne struggles on.
But good things happen as well. Today, not only did the evening grosbeaks show up again but American goldfinches, like yellow ping pong balls, arrived and bounced around the garden. However, the greatest surprise was the appearance of a hermit thrush slipping out from behind a rose bush to take a drink.
Another wonderful surprise was the hot weather. I went from bush jacket to sweats to long sleeved shirt. This is as good a time as any to remind gardeners to use sunscreen. Keep the container by the back door to remind you to put it on every time you go out to do garden work. It is no fun at all to have pre-cancerous lesions burned from your face. That is the kind of surprise you really, really want to avoid.
Thursday, 22 May 2008
THE BEST DRESSED NORTHERN GARDENER
A vision of loveliness, the northern gardener steps out. She’s wearing ratted out jeans with the Stanfields showing through, Nipigon nylons, Canada Tire duckies, several layers of sweats topped by a quilted bush jacket, and a toque. On her hands are mismatched rubber gloves. Perrrfect! But she is as happy as if she were wearing Prada. It’s going to be a nice day and she can do a little planting, puttering and pottering.
Yesterday, I planted a second flat of cosmos and a flat of marigolds. I also planted a long box of geraniums and pushed it under the back steps to get the plants out of the wind. This was my first attempt at growing geraniums inside and the results are heartening - big, fat, healthy plants. The highlight of the morning was the arrival of two evening grosbeaks, the first I have seen in my yard. They drank at the bird bath (a large plant saucer on the ground) and sallied on.
Today I am moving more flower flats outside and putting all the veggie flats (cucumber, squash, zucchini) and herb pots in the back shed.
Wednesday, 21 May 2008
ICE COLD BLOOMERS
Yesterday, it was so cold, it was unpleasant to walk though the garden, much less sit outside and drink tea. Nevertheless, slowly, a garden is coming into bloom.
The crocus have been in flower for two weeks. The arabis is beginning to bloom. And the little bulbs, so reliable year after year, are popping out for the first real spring colour.
Unlike tulips and other large bulbs which can break a Northern gardener’s heart, the little bulbs never let you down. Here come the deep blue Siberian squill (or Scilla), the long blooming grape hyacinth (or muscari) the intense blue of glory of the snow (or chionodoxa) and my fav, the blue puschkinia. The garden bed by the house is alive with species tulip (tulipa tarda), a short plant with wide-eyed yellow flowers. If you plant these bulbs in the fall, plant in drifts of twenty or more to get any kind of show in the spring. Alone each flower is small but en mass, they look grand.
Let it blow or snow, still they grow.
Meanwhile, I plant three flats of impatiensin the sheltered shade garden. I have the marigolds outside shivering and awaiting a warmer day.
Tuesday, 20 May 2008
NOT SO FREQUENTLY ASKED QUESTIONS
What to put in between plants to keep down weeds. There are really two types of gardens, thickly or thinly planted. I try to plant so thickly, filling up all the spaces, that the weeds have no room to emerge. That’s the plan although not all the weeds have signed on.
Other gardens consist of carefully spaced perennials. The new non-grass lawns consist of an arrangement of shrubs, plants and large rocks or other garden features. But, what to put in between?
First, on no account use gravel, even coloured gravel, unless you want to explore the far reaches of insanity. Gravel tracks in the house, shoots from the lawn mower, allows weeds to push though, migrates everywhere. Also do not use sheet plastic covered with rocks stolen from the pebbly beaches of the Big Lake. Plastic is death to the soil (no sun, no rain, just slugs). The style looks good only in Arizona where they can’t help it.
Instead consider weed barrier. Martin’s Nursery Land has weed barrier in various widths. I imagine the other nurseries around town sell it too. It is easy to spread. Sun and rain seep through maintaining a healthy soil. Cut a big X where you want your plant, fold back the points and plant. The weed barrier is held in place with special pegs or piles of soil or attractive rocks and it does stop weeds.
Bark chips are a good option. They biodegrade but slowly. One bag goes a long way. I saw a garden path made of bark chips, attractive and soft underfoot. This long winding path through a veggie garden required one new bag of chips every year. Other natural materials such as cocoa hulls are becoming available.
I visited a perennial garden in Manitoba which used thick mulch chopped by a shredder. This looked so attractive that, for a while, I was tempted to buy a small shredder but stopped myself when I realized my yard was so small I had nowhere to put it. The Manitoba shredder was hidden behind a set of cedars. The gardener fed all her garden waste, leaves, small twigs, and grass clippings into it and it chuntered out a fine product, easy to spread. If I had a bigger garden, I would definitely buy a shredder.
Monday, 19 May 2008
NOW IS THE HOUR
This is the time to thoroughly weed the garden. The soil is soft (not baked summer hard) and, if you weeded last October, weeds should be few. Of course, it is cold and wet out there so I use rubber gloves, not the cotton type.
But every gardener has to face a couple of unpleasant truths. . First, the more fertile your soil, the more abundant the weeds. If you spread manure or compost or fertilizer in your garden beds, your flowers thrive but the weeds also enjoy the pleasant accommodation. This fact alone could make one drop gardening to take up drinking.
Second, the root-spreading weeds have a nasty habit of breaking off at the soil line. This habit evolved in the wild so that the plant root could continue to grow even though the leaves were pulled by a deer or other plant eater. So you cannot yank out most weeds. You have to dig using some sort of long thin tool. I use an old screwdriver and also a special thin trowel.
The late, beloved gardener, Lois Hole, whose books give great advice to Thunder Bay gardeners, had a trick to keep down weeds. Whenever she finished working in one spot, she swept the side of the trowel across the top of the nearby soil, slicing away a thin layer. This discombobulates any tiny weeds that are just starting up.
Sunday, 18 May 2008
LILACS LOVE THUNDER BAY
best shrubs for Thunder Bay? My first recommendation would be lilacs. Many varieties thrive here. When lilac time arrives in June, you can walk around the older areas of town drowning in the scent.
The most widespread lilac in Thunder Bay is the heavy scented syringa vulgaris,(or common lilac). Single or double flowered heads, in mauve, white, purple or magenta, grace trees ranging up to eight feet in height. Common lilac is often used for hedges. Although all lilacs prefer the sun, vulgaris can be seen around town growing happily on the north side of buildings. This variety produces suckers which means the hedge fills in quickly but grows wider and more tangled as the years go by unless trimmed vigorously. If you have the space, it is a great choice.
My small back garden has room for several lilacs. The two large Preston lilacs both over 10 feet tall are not as heavily scented as the vulgaris or my French lilacs, but they are hardy, beautiful, non-suckering and covered with blooms. Coral, a pale pink, opens the season and its neighbour, Royalty, a dark purple, follows.
A selection of French lilacs range along the fence. The French lilacs are about 6 feet high, non suckering, with a strong, traditional lilac scent. My three favourites are Sister Justina (white), President Grevy (blue) and Mme Casim Perier (a large-flowered white).
Tall Japanese lilac, Chinese Lilac, Manchurian lilac, Amur lilac and others appear from time to time in local nurseries. As long as a shrub is hardy to our zone 3, it will probably thrive. Even a tiny space can hold a lilac. The little leaf or Korean lilac, a small bush only one metre high with fragrant pink blooms, looks good in the new grassless front gardens.
I never cut the spent blooms from my lilacs and yet I have a heavy crop of flowers every year. I cannot reach the top blooms and I am not about to set up ladders to do this useless task. The birds enjoy the seeds over the winter. In spring, the lilacs always burst forth.
Snow, Rain, Wind and all the Jazz
You have to be tough to be a perennial in Thunder Bay. Especially this spring. Yet, in spite of freezing nights and icy winds, slowly they grow. Even some of the annuals manage. I planted a flat of cosmos yesterday and it braved the snow this morning without a qualm. I've planted the sweet pea seeds and all the bulbs, but hope for warmth. Please, weather gods, give us gardeners a break!
There is a moral here for us Northerners. Never plant anything unless it is hardy for our climatic zone which is 3 (or lower). If you take a chance on a zone 4 plant, put it in your warmest, most sheltered spot. My Daphne is a zone 4 -er and it is struggling. A few years ago I was heart broken to see my neighbours come home from a local plant-selling place with three trees labelled for zone 6. Of course the poor things died and I blame the seller, a chain store, for bringing in unsuitable plants. Our local nurseries are, for the most part, very responsible and sell only what will grow here. So read that label or ask a clerk. If the clerk does not know, ask the owner of the business. Or buy from Manitoba mail order houses like Boughen, Morden etc. where they grow their own stock.
There is a moral here for us Northerners. Never plant anything unless it is hardy for our climatic zone which is 3 (or lower). If you take a chance on a zone 4 plant, put it in your warmest, most sheltered spot. My Daphne is a zone 4 -er and it is struggling. A few years ago I was heart broken to see my neighbours come home from a local plant-selling place with three trees labelled for zone 6. Of course the poor things died and I blame the seller, a chain store, for bringing in unsuitable plants. Our local nurseries are, for the most part, very responsible and sell only what will grow here. So read that label or ask a clerk. If the clerk does not know, ask the owner of the business. Or buy from Manitoba mail order houses like Boughen, Morden etc. where they grow their own stock.
Friday, 16 May 2008
BIRDS GALORE
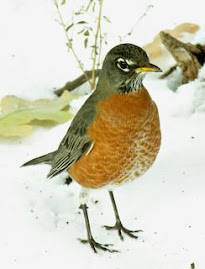
Early this morning, about 6 a.m., I stepped out the back door to hear an astonishing sound —the song of a hermit thrush. The high sweet notes always make me shiver. The song is the most ethereal of all the boreal birds. Yet it is seldom heard in the city. However, a friend in Fort William reported a hermit thrush in her garden last week, a rare sight. My hermit thrush sang from high in the neighbour’s spruce tree. This bird is robin size, brown with a spotted breast and reddish tail. It is often seen on the ground looking for grubs and worms.
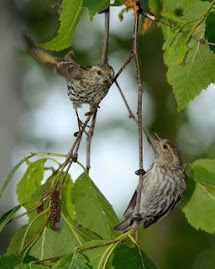
My garden is alive with birds these days. The sparrow tribe is well represented: chipping sparrow, white throated sparrow, junco, white crowned sparrow and, of course, the resident house sparrows. The junco and the white crowned are just passing through. The others have come to nest if they can. Sparrows are voracious seed eaters and they make regular patrols through the garden beds.
A ‘sweep, sweep’ whistle announces a group of pine siskins who love the Niger feeder. I am looking out for gold finches but so far they have not paid a visit. A friend in the County Park area has evening grosbeaks at her feeders. A robin sits in my crab apple tree and clucks and laughs. Few people know that a robin can laugh but it can. It also sings “cheer-up cheer-up” but it often throws in a few laughs to confuse the listener.
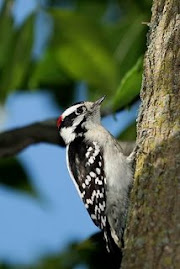
A red breasted nuthatch honks from the tall Manitoba maple next door. These trees are often considered too big for city gardens but birds love them. A woodpecker of some kind lives in there too. A friend complains about the persistent drumming of the local flicker. May is mating time for all the woodpeckers. The males often drum maniacally trying to attract a mate. Like all love frenzies, it will pass.
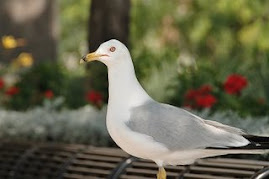
The usual city customers come by. Blue jays squawk even when they fly overhead, starlings mob the feeders, grackles patrol for slugs and grubs. Crows often hop down to see what they can find and gulls wheel over head.
I am hoping the ban on pesticides and herbicides will help the birds. And it is encouraging to see so many city people planting trees, bushes and lots of greenery, just the stuff birds love.
My garden is alive with birds these days. The sparrow tribe is well represented: chipping sparrow, white throated sparrow, junco, white crowned sparrow and, of course, the resident house sparrows. The junco and the white crowned are just passing through. The others have come to nest if they can. Sparrows are voracious seed eaters and they make regular patrols through the garden beds.
A ‘sweep, sweep’ whistle announces a group of pine siskins who love the Niger feeder. I am looking out for gold finches but so far they have not paid a visit. A friend in the County Park area has evening grosbeaks at her feeders. A robin sits in my crab apple tree and clucks and laughs. Few people know that a robin can laugh but it can. It also sings “cheer-up cheer-up” but it often throws in a few laughs to confuse the listener.
A red breasted nuthatch honks from the tall Manitoba maple next door. These trees are often considered too big for city gardens but birds love them. A woodpecker of some kind lives in there too. A friend complains about the persistent drumming of the local flicker. May is mating time for all the woodpeckers. The males often drum maniacally trying to attract a mate. Like all love frenzies, it will pass.
The usual city customers come by. Blue jays squawk even when they fly overhead, starlings mob the feeders, grackles patrol for slugs and grubs. Crows often hop down to see what they can find and gulls wheel over head.
I am hoping the ban on pesticides and herbicides will help the birds. And it is encouraging to see so many city people planting trees, bushes and lots of greenery, just the stuff birds love.
Thursday, 15 May 2008
COMPOST AND LILIES
Some tips on compost from friends and readers.
Mulching the leaves with a mulching mower or a shredder makes the compost work better.
Place leaves in black plastic garbage bags and leave them for two years. When you open the bags, they are pretty well composted. Add to pile.
Put big sticks upright into the compost in the fall and it will not freeze as solidly.
Use a compost mixer to stir up the compost in the fall and it will not freeze.
General agreement that the black composters are not very good.
And thanks for this tip re: my frozen compost. Let the hose trickle for a couple of hours and that should help unfreeze the compost pile. I am going to try this today.
More tips welcome.
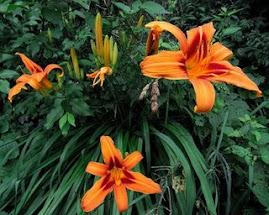
LILIES
Even though the spring has been cold and wet so far, I am tempting fate today because I'll start planting today. First the bulbs, then the perennials and finally, next weekend, the annuals. Lastly the vegetable plants.
I have three sorts of bulbs: lilies, acidanthera and crocosmia (also called montbretia). I started all these bulbs inside two weeks ago and all have put out a tiny tip. Six of the lilies will go in big pots and get replanted in the garden in late August. The crocosmia and the acidanthera will mainly go into pots. Left overs go directly into the garden. The acidanthera is a one-off. It will not over winter outside and I have no luck carrying it over inside. I grow it for its scent.
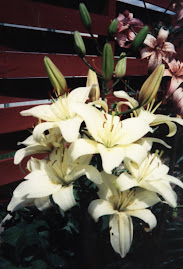
Lilies are a miracle of beauty. The best kind for Thunder Bay are the Asiatics. The oriental lilies do not winter well in the garden although some people dig them up and winter them inside. T&T Seeds offer a hardy trumpet lily which winters well. The martagons are marvelous too but very slow and expensive - maybe next year.
Lilies, like tulips, have to be planted deep, deep. You have to get them down eight inches at least. I'll put some MYKE bulb granules in the planting hole.
However, I have a new worry. Those big black squirrels which had invaded Thunder Bay have sometimes shown up in my yard. I have heard that in southern Ontario, they dig up tulip bulbs and so I worry about lilies. The problem with squirrels in the city is the lack of predators. No wolves, hawks, foxes or coyotes to keep down the numbers as in the wild. So they thrive. In the Toronto area, they are as numerous and pesky as black flies.
Last summer, a squirrel invaded my back shed. I bought a product at Canada Tire called Critter Ridder and sprinkled it everywhere and it worked! Great item to have on hand because it repels skunks too. But watch out Thunder Bay. One of these days, racoons will show up in numbers. They were seen in the city last summer.
Mulching the leaves with a mulching mower or a shredder makes the compost work better.
Place leaves in black plastic garbage bags and leave them for two years. When you open the bags, they are pretty well composted. Add to pile.
Put big sticks upright into the compost in the fall and it will not freeze as solidly.
Use a compost mixer to stir up the compost in the fall and it will not freeze.
General agreement that the black composters are not very good.
And thanks for this tip re: my frozen compost. Let the hose trickle for a couple of hours and that should help unfreeze the compost pile. I am going to try this today.
More tips welcome.
LILIES
Even though the spring has been cold and wet so far, I am tempting fate today because I'll start planting today. First the bulbs, then the perennials and finally, next weekend, the annuals. Lastly the vegetable plants.
I have three sorts of bulbs: lilies, acidanthera and crocosmia (also called montbretia). I started all these bulbs inside two weeks ago and all have put out a tiny tip. Six of the lilies will go in big pots and get replanted in the garden in late August. The crocosmia and the acidanthera will mainly go into pots. Left overs go directly into the garden. The acidanthera is a one-off. It will not over winter outside and I have no luck carrying it over inside. I grow it for its scent.
Lilies are a miracle of beauty. The best kind for Thunder Bay are the Asiatics. The oriental lilies do not winter well in the garden although some people dig them up and winter them inside. T&T Seeds offer a hardy trumpet lily which winters well. The martagons are marvelous too but very slow and expensive - maybe next year.
Lilies, like tulips, have to be planted deep, deep. You have to get them down eight inches at least. I'll put some MYKE bulb granules in the planting hole.
However, I have a new worry. Those big black squirrels which had invaded Thunder Bay have sometimes shown up in my yard. I have heard that in southern Ontario, they dig up tulip bulbs and so I worry about lilies. The problem with squirrels in the city is the lack of predators. No wolves, hawks, foxes or coyotes to keep down the numbers as in the wild. So they thrive. In the Toronto area, they are as numerous and pesky as black flies.
Last summer, a squirrel invaded my back shed. I bought a product at Canada Tire called Critter Ridder and sprinkled it everywhere and it worked! Great item to have on hand because it repels skunks too. But watch out Thunder Bay. One of these days, racoons will show up in numbers. They were seen in the city last summer.
Tuesday, 13 May 2008
WHAT CAN YOU DO WITH THE FROZEN COMPOST?
As mentioned before, I have a large open compost pile behind the garden shed. However, right now, it is frozen solid. Yesterday, I removed its overcoat of stalks and leaves to find icy black soil half way down. Grandson Marc arrived to fill the big flower pots but I had no compost.
This is a typical Thunders Bay problem. In a week, the garden will be ready to plant but the compost will not be usable until the end of May. We solved the problem by using the soil from the vegetable garden. Marc mixed it up with some manure (bought) and the remains of the Pro-Mix to lighten the mixture a bit. When the Pro-Mix ran out, I brought out some peat moss I had stored in the shed. He filled several pots and flower boxes.
At the end of the month, I’ll shovel thawed compost into the veggie plot before I plant the vegetables.
While Marc was filling the containers, I dismantled my black plastic composter to see if there was anything useful in there. Nothing after two years! Another typical Thunder Bay problem. I found layers of greasy half rotted leaves, a slimy mess of garbage and, plenty of dry foliage still intact, a two-year collection of undigested garden waste. In all, about an inch of top soil had been produced. The manure I’d tossed in there had not started the process working. Why do I get wonderful compost from my big open compost pile but nothing from this unattractive, hi-tech, black plastic container?
Perhaps it was set in a spot that was too shady. I dismantled the thing and set it up in the sun.
Here are a few Thunder Bay compost concerns.
1) Critters. I have skunks prowling my neighbourhood. Other people have bears. I heard of someone who got rats. Rats! That is why I put no food scraps in the uncovered compost. Sometimes, I liquefy food leftovers and pour it in as a liquid.
2) Slow, so slow. In the heat of summer, steam rises from the compost pile. If you put your hand into the centre, you can feel the heat. Bit in winter, nothing happens. It takes over a year to make decent compost.
3) Frozen just when you need it (see above post).
4) A compost pile needs lots of room, at least one metre by one metre. Many small gardens do not have an inconspicuous spot or a large enough space.
Sunday, 11 May 2008
The unpottables
My unpottables .
Coleus. I have grown it from seed and also bought it from local nurseries. I love the variegated leaves but outside the plant does not thrive for me for any length of time.
Dahlias. An experienced gardener told me that dahlia just do not like pots.
Sweet peas - skimpy
Moon flowers – did not bloom before frost.
Evening stock.(also called night scented stock) I am not giving up on this plant because the scent is so wonderful and I want it on the patio. But, it does not like to be transplanted.
I hate dracaena. An ugly spiky thing. The typical Thunder Bay arrangement is a dracaena in the middle surrounded by red salvia. It looked great in 1965.
Leaf Lettuce - not great results. Perhaps the wrong variety.
Saturday, 10 May 2008
SOME PICKS FOR POTS
Some plants are at home in pots and others are not. The seed catalogues often indicate which plants love a container.
1) Begonias. I like them better in window boxes or big pots than in the garden bed. The hanging varieties are not as floriferous as the regular. Begonias like semi shade and local begonia aficionados buy special fertilizer for them.
2) Geraniums – old favs for window boxes and containers.
3) Lobelia – is there anything more lovely than a pot of dark blue lobelia? For the shade or semi shade.
4) Pansies – OK, they have to be deadheaded and, as July wears on, the blooms get smaller and smaller. But I put them with the begonias and by the time the begonias are in full bloom in late July, the pansies can be pulled. Pansies are just so appleaing and a window box full of pansies is a joy.
5) Nasturiums – easy to grow from seed so even the kids can do it. There are hanging varieties that work well in a window box or on the edge of big pots. For some reason, they and begonias do not get along – chemistry I suppose.
6) Roses. See past post on sleeve roses.
7) Hostas look good in pots and in late August they can be transplanted in the garden.
8) Wave petunias are great (but expensive) as are the miniature petunias which do not have to be dead headed.
9) Many, many small annuals that do not have to be dead headed. such as dianthus, ageraturm, alyssum, impatiens, gaillarda, Dahlberg daisy etc. Check you nursery catalogue for suggestions.
10) Acidanthera (see post)
11) Herbs. I like herbs in pots near the back door where they are handy. Most herbs are slow growers and, if you put them in the perennial bed, the other plants walk all over them. My daughter makes up a big pot of mixed herbs – dill, basil, cilantro, parsley and oregano. They all clump in together and grow well on her deck. I put the various pots in a window box on the railing outside my back door. On the other hand, you might want to leave the herbs inside in a sunny window.
12) Pitiful plants. Perhaps you see a neglected perennial at one of the temporary nurseries set up around town (Wall-mart, Canada Tire, Zellars etc). By late June, the left-overs are a pitiful sight. But they are on sale! Rescue it, put it in a container, give out with the TLC and plant in the perennial bed in early September. If you put a weak, droopy, broken-down plant in among your healthy perennials, the chances are the patient will not survive. Nearby healthy plants will steal all the sun and suck up all the nutrients and the patient cannot defend itself. It’s war out there. So, first, pamper it in a pot of its own.
13) Feverfew. This intrepid volunteer, growing wild all over town, does well in pots. A back lane freebie. Wild ox-eye daisies or black-eyed susans are other free pot plants.
Friday, 9 May 2008
THE FULLER THE SUN, THE BIGGER THE POT
I like big pots full of blooms. This year I am going to do big lilies in a couple of pots. I have often put in roses (the miniature rose called “the Fairy” looks lovely in the centre of a pot) and I love a big pot of acidanthera on the patio. The scent is wonderful.
But take note Thunder Bayers. In the very long hot days of June and July, small pots dry out fast. When you have blazing sun from 4 a.m. until after ten at night, small pots of flowers do not stand a chance. All containers need lots of water but the bigger pots hold it better. It can get so hot in Thunder Bay that you simply cannot water a small container often enough. Twice or even three times a day won’t do it. If you want pots of flowers on your sun-lit patio or deck, use the biggest pots or boxes. (The fuller the sun, the bigger the pot.) Conversely if you have a hanging basket or a small decorative pot, try to place it in the shade.
I use plastic containers for the convenience. The big ceramics are heavy and have to be put inside in the winter. Wooden boxes are nice but they rot – even the cedar boxes. All pots need drainage holes and some do not have them. You have to punch them through yourself, not always an easy job. Many long window boxes do not have enough drainage holes and you have to punch extra. You have to cover the holes with some shards, shells (at last a use for all those shells you brought back from Florida!) or large stones, set so that they keep the soil from clogging the holes when the pot gets soaked as it surely will during one of our famous thundery summer storms. Before I fill the pot, I set it up on to two or three bricks placed so that the bricks do not cover the drainage holes. This ensures good drainage.
I also put some Safer’s Slug granules under the pot between the bricks. The evil slug tribe can hide under a pot and even nest inside the drainage holes among the shards. In the dark of night, they emerge, climb up the side of the pot and munch, departing with the dawn. (For further hints to stop slugs, stay tuned to this blog). The problem with slug granules (besides the expense) is the requirement to replace them after a rain. However, a sprinkle under a pot lasts a long time. You can also put coffee grounds under the pot. Slugs hate coffee so if you are a coffee drinker, you might want to start collecting the grounds now. Chapters also gives away free grounds.
Thursday, 8 May 2008
PRUNE THAT THING!
Tomorrow I start to prune. There are many rules for pruning but the following are the main ones.
1) Do not cut away more than one third of a bush or tree. I cut much less.
2) Prune now, before the leaves come on the trees
3) Prune now because you can take the waste to the dump this week for free.
4) Use sharp clean tools. At the least, you need a good pair of secataurs for small branches and a good sharp small saw for larger ones.
5) Cut any branches that cross or rub each other or are rubbing on a fence or the house. The bark on these branches will rub away allowing disease into the tree. Remove all dead, broken, rotten, pulpy branches and all water shoots (soft pulpy branches that grow straight up). Take out any branches that slap you as you walk your garden paths. After a rain or a heavy dew, these branches can be annoying.
6) Don’t be too quick to pronounce a rose or other shrub as dead. Often they are slow to leaf up and many do not finish until June 1.
7) When removing larger branches, make a vertical cut close to the trunk.
8) Never “top” a tree. It’s a death sentence.
I'll prune my Preston and French Lilacs and snip off all the tangled branches on the Highbush Cranberry and the Nanny Berry. The crab apple and the mountain ash seem OK this year. Indeed the mountain ash is the neatest of trees. If you have a lot of trees and shrubs, it is worth checking out a book on pruning from the library. A recommended book is Northern Gardens by Brian Andrews but there are many tomes written on this subject. I learned to prune from my father. IMHO, the best way to learn is to watch someone who knows what they are doing.
Wednesday, 7 May 2008
FEEDING THE BIRDS
There is no doubt that birds are messy eaters. They do not clean their plates. They drop seeds on the ground. Sloppy eating is an advantage in the wild. The seeds flung on the ground produce more plants and thus more seeds.. However, in a small garden in the summer, the seed fallout can be a mess. The accumulation of sunflower hulls and excess seeds can make a thick carpet under the feeder, so thick it wipes out small plants. So if you put up a bird feeder, especially a large bird feeder, you have to find a spot where the excess seeds and hulls can fall without too much hassle.
It takes the birds a few days to find a new feeder. They like to have a bush or tree near-by to perch on while waiting their turn at dinner. Most birds are polite, feeding a few at a time. However, hummingbirds, the most feisty bird in birdland, love to battle and chase each other away. They will drive off other hummers even after they have eaten their fill.
Hummingbird liquid, made with 1 cup white sugar and four cups boiling water, should be kept in the fridge. The feeders need to be cleaned out from time to time and the best way to do this is with a long bottle brush.
Hummingbird feeders often attract ants which crawl up the tree or the feeder hook to get at the sweet liquid. When ants get trapped inside the liquid, the hummers reject the feeder. The only way I have found to repel ants is to paint the feeder hook (or the branch) with a sticky paste called Tanglefoot, available from the nursery. The ants crawl up but once they hit the Tanglefoot, a few get stuck and the others back away. A bit unsightly but this is the only method I know that works.
Tuesday, 6 May 2008
HARDEN THEM OFF? HOW?
“As the weather warms up in early May, move your seedlings outside to harden off.” So says the article, written for the wussy southern Ontario gardener. As the weather warms up! Please! It may do so in the afternoon but after dark the temperature falls below freezing, death to any seedlings left outside.
Even during the day, we have to contend with cold drying winds that can desiccate tiny leaves turning them a sickly white colour. In fact, the wind can be more dangerous to tender plants than the cold. Plants with largish leaves, like geraniums, are particularly susceptible to wind damage.
I find the hardening process the most difficult part of growing plants from seed. It is a lot of work carrying flats of plants in and out morning and evening. Too much work for me. As soon we get nights above freezing, I put some flats on a table in my unheated back shed. This gets them out of my basement and I can start cleaning up down there. The shed protects the plants from the wind and they get a good western light from the windows. In the middle of the month, I will put some of the hardiest (cosmos, bachelor button, marigold) outside beside the house in a spot sheltered from the wind.
However, when flats are left outside, rain can be a danger as well. A heavy rain can flood the flats so that the packs are sitting in water. It is best to remove the under tray and place the packs into mesh trays so that rain water can drain away.
Some people may say a green house is the answer but heating a green house through our cold nights is an expensive proposition. Nor does it seem sensible to build a greenhouse to be used for only two or three weeks a year. In my case, my garden is too small for even a tiny greenhouse.
So my plants do not get hardened off as the advice books suggest. A few days before planting, I set them outside in a sheltered spot and that is the only introduction to the wide world they will get. After that they are on their own. In most cases, they do OK.
Sunday, 4 May 2008
PERENNIAL LIST
I like plants that are tough and long flowering and put on a show. I know that in Toronto, muted colours and ornamental grasses are the rage but, in Thunder Bay, I get enough muted colour all winter In summer, I want glow and show.
Day lilies – Catherine Woodbury is my fav. But there are hundreds of lovely varieties.
Arabis – the best edging IMO. Brilliant white flowers cover spreading green leaves in the spring. Lamium makes a good edging in the shade.
Asiatic lilies Hundreds of varieties, many colours, a rainbow of choice. Note: Orential lilies are not reliably hardy here.
Peonies, bombe type such as Festiva Maxima , carmine flecks on white blooms or the mouthwatering pink of Sarah Benrhardt.
Siberian iris – these almost grow much too well and always seem to be ready to divide, not an easy task. I have ‘butter and sugar,” “Casear’s brother,” “sparkling rose” and many others. I like Siberian iris better than bearded iris – longer bloom times.
Sedums of various types especially Autumn Joy for the fall
Delphinium – I grow the Pacific Giants, the very tall ones that need aggressive staking but the shorter varieties such as”blue fountain” and “bluebird” are nice too
Aruncus or goat’s beard for the semi shade
Monarda or bee balm. Daisy-like bright magenta flowers.
Sweet William. I think this spreads itself by seed. But even so, it has a lovely spicy scent and lovely variegated pink flower heads.
Hostas. I love big dramatic hostas with wide leaves. The small hostas are hardly worth the effort. I like lime coloured leaves or the varieties with cream centres or cream edging.
Columbine (Aquilegia). For shade
Bleeding Heart , pink. For shade.
Monkshood (Aconitum napellus)
True geraniums such as Johnson’s Blue
Sea Lavender. A soft cloud like baby breath. Blooms in August.
Shasta daisies (Chrysanthemun maximum) Is there anything as lovely as a clump of big daisies? I even welcome the wild daisies that sometimes appear in the garden.
Phlox If I had more room I’d have more. I have white, lilac and magenta. Tall and tough with a scent like mown hay. They hit the garden in August and carry it to the frost. Absolutely necessary.
Allium gigantium. The bulbs, which are expensive, have to be planted in the fall. In late May, a tall stalk emerges to produce a perfectly round purple ball of flowerets. Starts the spring with a bang.
Meadowrue (Thalictrum acquilegifolium) Lovely ferny leaves and fuzzy fairy flowers. It spreads by seed but can be managed.
What I would not plant again
Lily of the valley – a root spreader
Astilbe – I do not have much luck with this plant – it lives but does not thrive
Species clematis – also spreads by roots. Just too vigourous.
Japanese peony – pretty but blooms for such a short time
Primrose – may emerge in spring, may not – too too fussy, my dear!
Day lily Stella d’oro – This is a short tough yellow day lily that is not showy enough for me.
Dropmore scarlet honeysuckle, a climber and oh so slow, years of inching along.
Lamb’s ears – kids like the fuzzy soft leaves but the plants do not add much to the garden, IMO.
Lupins – tried and failed.
Perennial asters – no luck with these either
Daffodils - nada
Jackman’s clematis – needs a warm spot near the house wall. I didn’t give it the right location.
Veronica – so-so stuff.
Huchera – I like it but it does not winter for me.
Violas – sold as perennials, but they don’t work for me.
Dahlias – my basement is too warm to over-winter the bulbs but I love them indeed, especially the dwarf patio dahlias.
PERENNIALS IN THUNDER BAY - ONE
I have been asked to recommend perennials for local gardens and to do this, I start with a meditation on gardens of the past
OLD TIME THUNDER BAY
Contrary to what some people think, old Thunder Bay, the city of the 20’s 30’s and 40’s, was not awash in English style perennial gardens. Most people had a few flowering plants in a limited number of species.
My childhood home on Van Norman Street was typical. In our small front yard we grew two shrubs, a bridal wreath spirea and a Hansa rose, both city favourites still.
In the back, a long narrow perennial bed stretched beside the fence. The usual medium-tall delphiniums resided there along with a couple of monkshood. Both are still seen all over town.
Like everyone else, we had a peony. Ours was “Festiva Maxima” and today the same plant routinely produces over a hundred blooms each year even though it must be over 75 years old. A bleeding heart, an orange spotted tiger lily and a large chunk of dark blue bearded iris rounded out the garden bed. Some lily of the valley grew in the shade of the honeysuckle bush at one end.
Aside from cleaning out the weeds once or twice a year, no special care was given to any of these plants. They were never pruned, tied up or fertilized. In 1950, my father was given a small pink rose bush (name unknown) but this was the only addition to the garden bed in twenty years until a few amethyst phlox were added in the early 70’s.
My parents did not grow the two most favoured Thunder Bay flowers, gladiolas and dahlias. The reason? Our small basement was too warm. At one time, dahlias bloomed all over the city, but with the onset of oil heating and finished basements, the cold storage room disappeared so it was difficult to over-winter the bulbs. Glads met the same fate and both lovely plants have declined dramatically here.
In those far off days, few people bothered with annuals. My mother bought a pack of nasturtium seeds and planted them in the wooden boxes beside the front steps. When new cement steps and an iron railing were constructed, the nasturtium planting ended.
I will mention one other common perennial of old. In a narrow strip between the side drive and the house, a tall pink-flowered plant grew vigorously. Most people then called it Policeman’s Helmet, but today, the same plant is given other names such as Himalayan impatience, wild snapdragon or Betty’s orchid. Tall as sun flowers, with reddish veined stems, this toughie flings up hundreds of small pink snapdragon-style flowers and, after a time, pops out thousands of black, very fertile, seeds. With a little effort, the seedlings can be held in check and in the right place, this is an attractive tall plant.
Stay tuned for a list of personal favourites plus a second list of perennial flops.
Friday, 2 May 2008
STAND WAY BACK FOR MANURE TEA
To make this excellent fertilizer, you need a big plastic garbage pail with a good fitting lid. This is the most important feature. Put the pail in a shady inconspicuous spot. Put in one gallon of fresh or old chicken manure. Fill the pail with water. Let sit. When you open the lid, hold your breath. Pour the liquid around the base of your plants. It is better to work at night when everyone is inside and not when the neighbours are having their yearly garden party. Fill up the trash can with more water and carry on. You don’t have to add more manure. One bucket of chicken manure does the entire summer. This is the cheapest, the smelliest and best fertilizer going. Do not fertilize perennials after August 1 but planting boxes and annuals can be fertilized until September. The smell dissipates quickly, thank heavens.
Thursday, 1 May 2008
HOW TO START A GARDEN FROM SCRATCH
In 1969, I bought a small house on Lyle Street and decided to start a garden. The back yard consisted of a square of grass so I picked a small area close to the back fence and dug out the sod. Then came the first problem. What to do with the sod? I piled it up beside the garage in an unsightly matted heap intending to haul it away if I could find someone with a truck to help me do it.
The soil in my new garden was stony and infertile looking. What to do now? I did not have a place to put the sub soil and I had no means to haul it away. I owned a Volkswagen bug, too small to haul in top soil. My garden plans were rapidly disintegrating. A week later, I broke my leg and that was the ignominious end of my first garden attempt. The next spring I sold the house but not before noticing that the ugly pile of sod had turned itself into beautiful compost. Lesson learned and remembered.
Here, IMHO, are the first five considerations if you plan to start a garden from scratch.
1. Get out the compass. All vegetables and most flowers need sunlight so you want to pick spots with maximum light. Now Thunder Bay has an advantage here. In June, the sun rises in the north-east (not in the east as in other places), crosses the sky and sets in the northwest. (not the west). Our long days give us many, many hours of sun. Unless you have only a north facing plot or are blocked in by trees or buildings, you should be able to find ample sun.
2. Decide where you are going to put your trees assuming you do not have any yet. Even a small garden should have trees. In my small garden I have a crab apple, a mountain ash and three Preston lilacs. All are over 15 feet. You do not want your trees to grow up and block the sun. If possible put them on the north side.
3. Figure out where you are going to put the compost. You want it tucked away somewhere. My compost pile is behind the garden shed. The pile is eight feet long and three feet wide and the compost is superb. A compost pile should be at least a metre by a metre. (I also have a black plastic container which is called a composter and, one of these years, it may even create compost.) I throw all vegetable matter (grass, garden clippings, soil, manure) into my big compost pile but never garbage. Reason: skunks live in the neighbourhood. I have seen them sashaying by on summer nights. I don’t want to do anything to attract them closer. Start the compost off with the sod you removed from your garden bed. But before you pile it up, shake out and save the good top soil held in the grass roots and spread the sods upside down for a few days to kill the grass roots.
4. Figure out what you are going to do with the sub soil. It has to be dug out to a depth of a foot and some books say more. It depends on what it looks like. Is is black and loamy or dry and stoney? Most likely the latter here in the north. If only we lived on the prairies where the top soil goes on forever! Not here. If there are big boulders they have to be dug out and can be placed artistically here and there as garden “features.” The rest of the sub soil has to be disappeared and the problem is where. If you have a buddy who has a bush lot or an old gravel pit….? (Note the city frowns on spreading stuff in the back lane.)
5. Figure out how you will transport the top soil to your new plot. Several local nurseries sell excellent top soil. Also, in spring, ads appear in the paper. Go and look at the soil before you buy. It might be full of weeds (or worse, crab grass – my advice is not to get top soil from Kaministiquia because it is crab grass city out there) or, as sometimes happens, it might not be very good. You want dark crumbly stuff. Get some old manure too and put some into the compost as well as mix it in with your top soil. (or if you have a source of chicken manure, make chicken manure tea – recipe follows).
Subscribe to:
Comments (Atom)